Difference between revisions of "HowTo Import a fluent mesh with interfaces"
m |
|||
| Line 10: | Line 10: | ||
The utility will preserve also the original patches as boundaries, but since they are no longer needed, they can be safely deleted from the polyMesh/boundary file. | The utility will preserve also the original patches as boundaries, but since they are no longer needed, they can be safely deleted from the polyMesh/boundary file. | ||
== Download== | == Download== | ||
| − | The sources of the test case can be downloaded from: [[http://openfoamwiki.net/images/ | + | The sources of the test case can be downloaded from: [[http://openfoamwiki.net/images/f/f3/Test_interface.tgz test_interfaces]] |
Revision as of 14:59, 15 March 2007
1 Purpose
The purpose of this short HowTo is to explain the few steps that are necessary in order to read a fluent mesh that contains interfaces.
2 How is it done
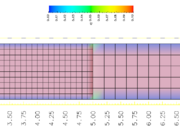
A mesh with an interface is a mesh containing two overlapping surfaces that do not necessary share the same discretization nodes, as seen in Figure 1.To convert such a mesh, just use fluentMeshToFoam utility. Let consider the current case, where an "inlet", an "outlet" and two interface "interface_coarse" and "interface_fine" boundaries are defined. The rest of the boundaries are defined as walls. Once imported, the mesh consists of actually two separated volumes, by the interface_fine and interface_coarse surfaces. The second step is to stitch the meshes by spliting the faces of the two interfaces creating polyhedral cells: stitchMesh ./ test_interfaces interface_fine interface_coarse test_interface/geometry/test_interface.msh
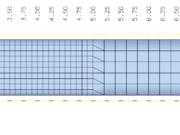
Now the mesh looks like in Figure 2.The utility will preserve also the original patches as boundaries, but since they are no longer needed, they can be safely deleted from the polyMesh/boundary file.
3 Download
The sources of the test case can be downloaded from: [test_interfaces]

